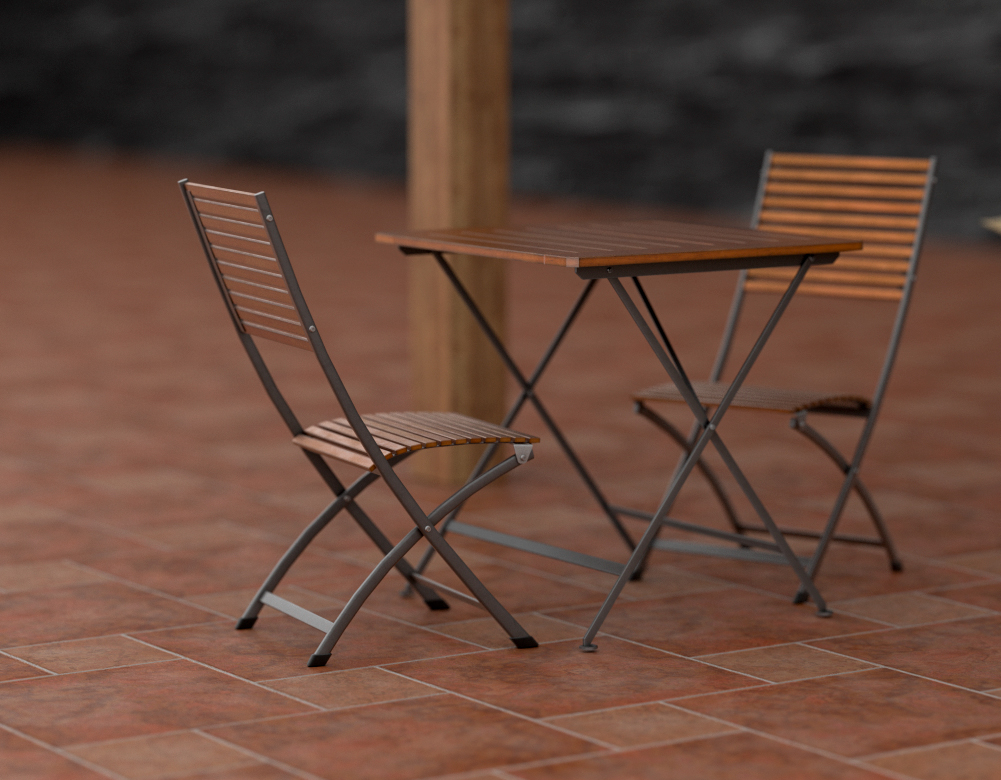
One thing all KeyShot users aim for is to make our renders look realistic. There are many different ways and methods to enhance the realism of a render, but in this mini tutorial, we will explore a series of tips that will be helpful in improving the realism of our exterior renders with projected shadows in a scene.
Let’s look at a practical example in an outdoor scene in KeyShot.
1. Selecting a good HDRI environment
The HDRI environment could be considered the most important and fundamental aspect for achieving a realistic render.
In our case, we should look for an HDRi environment in a repository that offers quality environments with good resolution. There are both free options that work very well. (Link to HDRMAPS.)
Once we have downloaded the HDRI that fits the ambiance we want to create for our render, we should go to KeyShot, in the left panel of the Library tab under ‘Environments‘, and there click on the folder icon highlighted in blue in the following image labeled ‘Import‘.
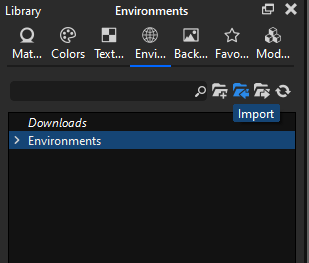
Afterward, a dropdown menu will appear for us to browse for the HDRI environment, which is the .EXR file.
Once we load it, we simply need to locate and select it, and it will be applied in the ‘Environment‘ tab.
2. Adjust the Perspective / Focal length of the KeyShot camera
Another important point to enhance the realism of our render is adjusting the perspective of our camera. We need to avoid the “fisheye effect” since renders should resemble our natural vision.
To do this, we will go to the right panel of ‘Project‘ and in the ‘Camera‘ tab, we will find the ‘Perspective‘ field. We will then enter a value >100.
3. Incorporate 3D context elements into the background
To create a more realistic atmosphere in the render, it’s important to include background elements that are in harmony. In our outdoor scene, we’ll need to incorporate plants, walls, pots, etc.
Let’s add a pot with cacti and some plants, which we have previously created, to bring more life to the scene:
4. Add 3D elements that cast shadows
By adding an object that partially blocks the light source from our environment, we create a shadow effect that helps to enhance the realism we’re aiming for in the scene.
The use of trees and natural elements often works very well because they create an imperfect shadow that conveys an effect our perception interprets as real.
5. Change the lighting mode
Something basic, but we must not forget, is to ensure that we have the Interior lighting mode selected. By default, KeyShot uses the ‘Basic’ lighting preset.
To verify that we have it set correctly, we need to go to the Project window, select the ‘Lighting’ tab, and choose Interior.
This change allows us to have global illumination, meaning that light will bounce throughout the scene, resulting in more realistic tones reminiscent of a real environment. Another aspect that adds to the realism of the render.
6. Photographic image adjustments in KeyShot
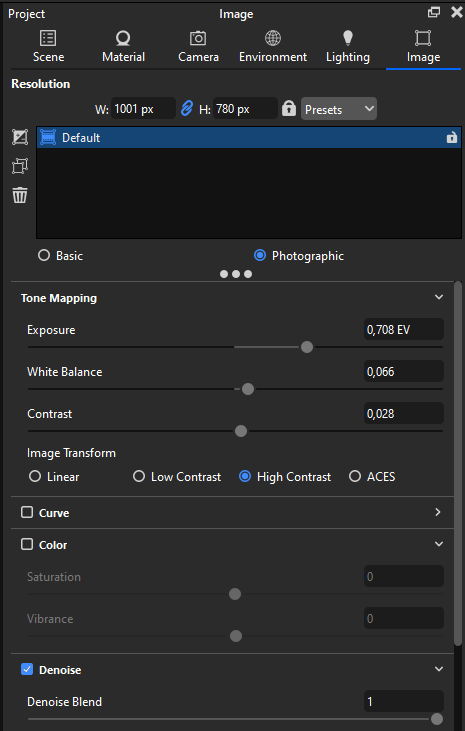
In the ‘Image’ tab, we need to adjust several parameters to enhance the image with more lighting and contrast. To do this, we navigate to the ‘Image’ tab and select the ‘Photographic’ mode.
We have increased the ‘Exposure‘ value to add more lighting to the image, adjusted the white balance to give it a bluer tone, and increased the contrast to make the image more visually impactful.
It’s also important not to forget to activate the ‘Denoise’ filter with a value of 1 to ensure the render is clean of noise.
7. Add camera blur to the background of the image
This point is primarily intended for renders that aim to highlight a product in the foreground while blurring the background environment.
In our case, it is useful to make the render more visually appealing, and the blurred background also helps improve the final realism of the render.
To do this, simply go to the ‘Camera‘ tab and check the box for ‘Depth of Field‘.
Once activated, we need to click on the object we want to be in focus with the cursor. Then, adjust the F-stop value based on the amount of blur needed.
Conclusion and final result
We have covered seven fundamental points that allow us to improve the outcome of our outdoor render in KeyShot.
The adjustments to environment lighting, camera settings, and 3D elements are crucial for achieving a visually pleasing result.
We also performed image post-processing in Photoshop and Lightroom, but we did not include it as a point since we wanted to encompass the entire process within KeyShot.
Here we can see the before and after.

